What did you do today?

Flooring Forum

Help Support Flooring Forum:

This site may earn a commission from merchant affiliate links, including eBay, Amazon, and others.
Looked at my repair again today. Not bad minus the non matching filler on the right side. Maybe I should rub some dirt on it.😝 Prolly coulda made some hoofer outta the sawdust and some glue but that’s not what the stars had in store for this countertop.
23F4199C-5025-432B-92A7-F047C5C26BB8.jpeg
 
Looked at my repair again today. Not bad minus the non matching filler on the right side. Maybe I should rub some dirt on it.😝 Prolly coulda made some hoofer outta the sawdust and some glue but that’s not what the stars had in store for this countertop.
View attachment 16510
Coulda used tiny artist brushes and painted the darker wood grain color across the filler....
...or maybe scratched in the wood grain with a utility blade and wiped stain across it. Another 4 hours and it would be 25% less noticeable. 😁
No, it looks great. Not much could be done without it costing crazy 💲💲💲
 
I keep bouncing back and forth between measuring jobs and my spiral staircase from hell job. The customersbare extremely patient and I'm extremely greatful.
Three lowers left to do, but Monday we plan to get the curved section of railing reinstalled.
I've just been putting in half days on this job. I can't take off a stair and leave in off overnight, so I only get one stair taken off, refinished and reinstalled. If the home was unoccupied, I could remove 4 stairs at a time, then "undress" them all, then pad them all, then carpet them all....... production style. The job would be taking 1/4 the time. Oh well, the customer is happy, I'm happy.... We're all happy! 🎉
 

Attachments

  • PXL_20230311_012740169.jpg
    PXL_20230311_012740169.jpg
    2.6 MB
  • PXL_20230311_012708982.jpg
    PXL_20230311_012708982.jpg
    1.6 MB
Only after the railing baulisters are dropped back into the tubular steel holders can they be tightened fully.
If they are tightened first, the holders will tweak to the right, left, forawds or backwards slightly making it impossible to slide the baulisters down inside them.
When the railing was originally constructed in place, the metal holders were tightened using two sockets, one below on the bolt and one above on the nut.
Since that can't be done this time, I used some snips and made some U-shaped, nut-not-spinners, out of some reinforcement plate metal and epoxied them in place. They work great. It would be nasty after dropping all those baulisters in place to have a few nuts spinning inside the holders.
 

Attachments

  • PXL_20230310_000541076.jpg
    PXL_20230310_000541076.jpg
    2.2 MB
  • PXL_20230310_000615182.jpg
    PXL_20230310_000615182.jpg
    2.8 MB
I shoulda bought the whole grocery cart full.
Just made a snack to check em out. 12 grain bread, a little squirt of mayo on one half, peanut butter on the other and BACON!
 

Attachments

  • PXL_20230311_211510397.jpg
    PXL_20230311_211510397.jpg
    1.5 MB
Coulda used tiny artist brushes and painted the darker wood grain color across the filler....
...or maybe scratched in the wood grain with a utility blade and wiped stain across it. Another 4 hours and it would be 25% less noticeable. 😁
No, it looks great. Not much could be done without it costing crazy 💲💲💲

It certainly could look better but I was being rushed so that’s what it looks like. Don’t like it, don’t rush me.
 
Wahoo, 53 degrees today at 2:16pm.
First totally rain free day in 3 weeks and only a few days when it got above 40. The whole month has been 5 to 10 below normal.
...it's them Canadians doin' it.
 
CJ, it still looks great!
Highup, looks like the stairs are coming along well.

I've had precooked bacon and sometimes it is better than the bacon cooked fresh. I used to cut it up with scissors and add it to scrambled eggs when making them for my father. I would scramble them with cheese and chunks of bacon. Sometimes throw in some sauteed mushrooms.

I don't know what temperature it was today bc I pretty much stayed in bed. I was too groggy to move. I had to get up to clear stuff out of the way-- cats knocked over a bin and mom couldn't get through. It had spilled out. I tried to pick it up but ended up almost falling down so I shoved it aside. Managed to cut my finger on something I picked up-- no idea what or how. I got her something to eat and then racked out again. Vision has been blurry today too so I just wanted to sleep it off. I kept sweating so I know it was warm. It's cooling off now. I can't wait for Monday so we get new AC.

I got up again and got food for Mom and then cleaned the toilet. I have the Toto with the Sanagloss finish so it is easier to clean. Only needs to be cleaned once per week or every 2 weeks. I know Mom's toilet must need to be cleaned again but I am not feeling up to it.
 
I keep bouncing back and forth between measuring jobs and my spiral staircase from hell job. The customersbare extremely patient and I'm extremely greatful.
Three lowers left to do, but Monday we plan to get the curved section of railing reinstalled.
I've just been putting in half days on this job. I can't take off a stair and leave in off overnight, so I only get one stair taken off, refinished and reinstalled. If the home was unoccupied, I could remove 4 stairs at a time, then "undress" them all, then pad them all, then carpet them all....... production style. The job would be taking 1/4 the time. Oh well, the customer is happy, I'm happy.... We're all happy! 🎉
All I can say is Yikes!

So in summation every spindle, two per step, has a heavy metal bracket that is through bolted to the step?

I don’t know anything about building hand rails but that sounds like some serious over kill? I understand the posts have to be sturdy but every spindle? That connection sounds stronger than the spindle itself? I think I’d of shot those puppies in with a brad nailer and been home for lunch…lol

I know you said the guy that built it isn’t around any more. Maybe you could find a family member and yell at them…lol

I give you a ton of credit, you certainly have a lot of patience… I get anxious just reading the posts! lol Keep up the good work…
The pie stairs have two of these, but each stair has three holes. The center one has a 3" bolt. The 12-in threaded rod acts as a long bolt for the back of one step and goes up through the top of the next step There's a tapered steel support at the leading edge of each of these pie steps and you'll notice a piece of steel tubing welded to the end of this support. The green arrows are the welds. This configuration has really helped with stair alignment because the holes in the steps and the steel baulister holders make it difficult to get these stairs out of alignment. Discovering this, was a relief.
Patience is a virtue, especially after you've committed yourself. Once started, there's no way I could quit.
I mean who would put it back together if I took it apart?
 

Attachments

  • PXL_20230312_181417926.jpg
    PXL_20230312_181417926.jpg
    1.1 MB
  • PXL_20230309_004757591~4.jpg
    PXL_20230309_004757591~4.jpg
    1.9 MB
  • PXL_20230312_181447347.jpg
    PXL_20230312_181447347.jpg
    987 KB
I don't know if there's a " correct " way to carpet stairs like this. They're probably is but I did it the same way I did 35 plus years ago.
Starting on the bottom side of the step, I cut the carpet flush with the edge. When flipped over and stretched to the back of the step the other edges are folded over. I figure that though it's a bit visible, it's kind of like a seam in a pair of jeans. As long as they're all even inconsistent...... It's good enough 😁
I discovered quickly on the pie stairs, that folding under the curved edge required some relief cuts to keep it from bunching up.
Where the corners meet, I just left a small triangle to fold under. A long tip on the glue gun works wonders. Less hand tacking is a good thing. The corners may be a little unorthodox, but turned out decent, so I'm happy with them. The underside of the stair is the only place I could use the electric tacker. Everything else was 7/8" wire nails.
 

Attachments

  • PXL_20230309_214703446.jpg
    PXL_20230309_214703446.jpg
    3.2 MB
  • PXL_20230309_214106166.jpg
    PXL_20230309_214106166.jpg
    3.3 MB
  • PXL_20230309_214154395.jpg
    PXL_20230309_214154395.jpg
    3.2 MB
  • PXL_20230309_004757591~5.jpg
    PXL_20230309_004757591~5.jpg
    457 KB
Took the family on the train into Grand Central Station today to check out the newly operational Long Island Rail Road terminal.

They Had to dig a tunnel under the East River and end 11 stories UNDER the existing terminal. Original plan was to open in 2009 at a cost of 3.5 billion. Opened last week (Just a tad behind schedule). The original bid was for 3.5 billion... Final bill came in around 11.1 billion (couple of extras I guess). Plenty of corruption involved along the way I'm sure to slow things down.

It's hard to imagine the engineering involved in a project like this. Digging through solid bedrock, trains on different levels, ventilation... Longest darn escalator I've ever seen.
escalator.jpg


Gotta give a tip of the hat to all the construction workers involved. Pictures don't do it justice. Immaculate and beautiful.... All 800,000 sq. ft

Along with all the marvel and art work are some nice terrazzo floors with lighted glass inserts. A lot of fancy tile work too.


Before and after:
$2500 is either expensive or half what it's worth depending on which side of the fence you're on.
It took over 3 hours just to get the curved section of railing to drop back into place. That's after spending an hour and a half with my lazer level making location points on the walls.
Crazy job. Not sure how to bill it out. I had no idea the railing was going to be such a temperamental beast. The guy who built and installed this custom railing is long gone..... so he can no longer be strangled or bludgeoned.
His mistake is when making this all every connection point was done at the machinist level.
All wood to wood, and all wood to metal joinery was fit perfectly.
Sounds good in theory that a one off staircase was made with such precision.
My nightmare removing the railing and it's bits and pieces were not expected at all.
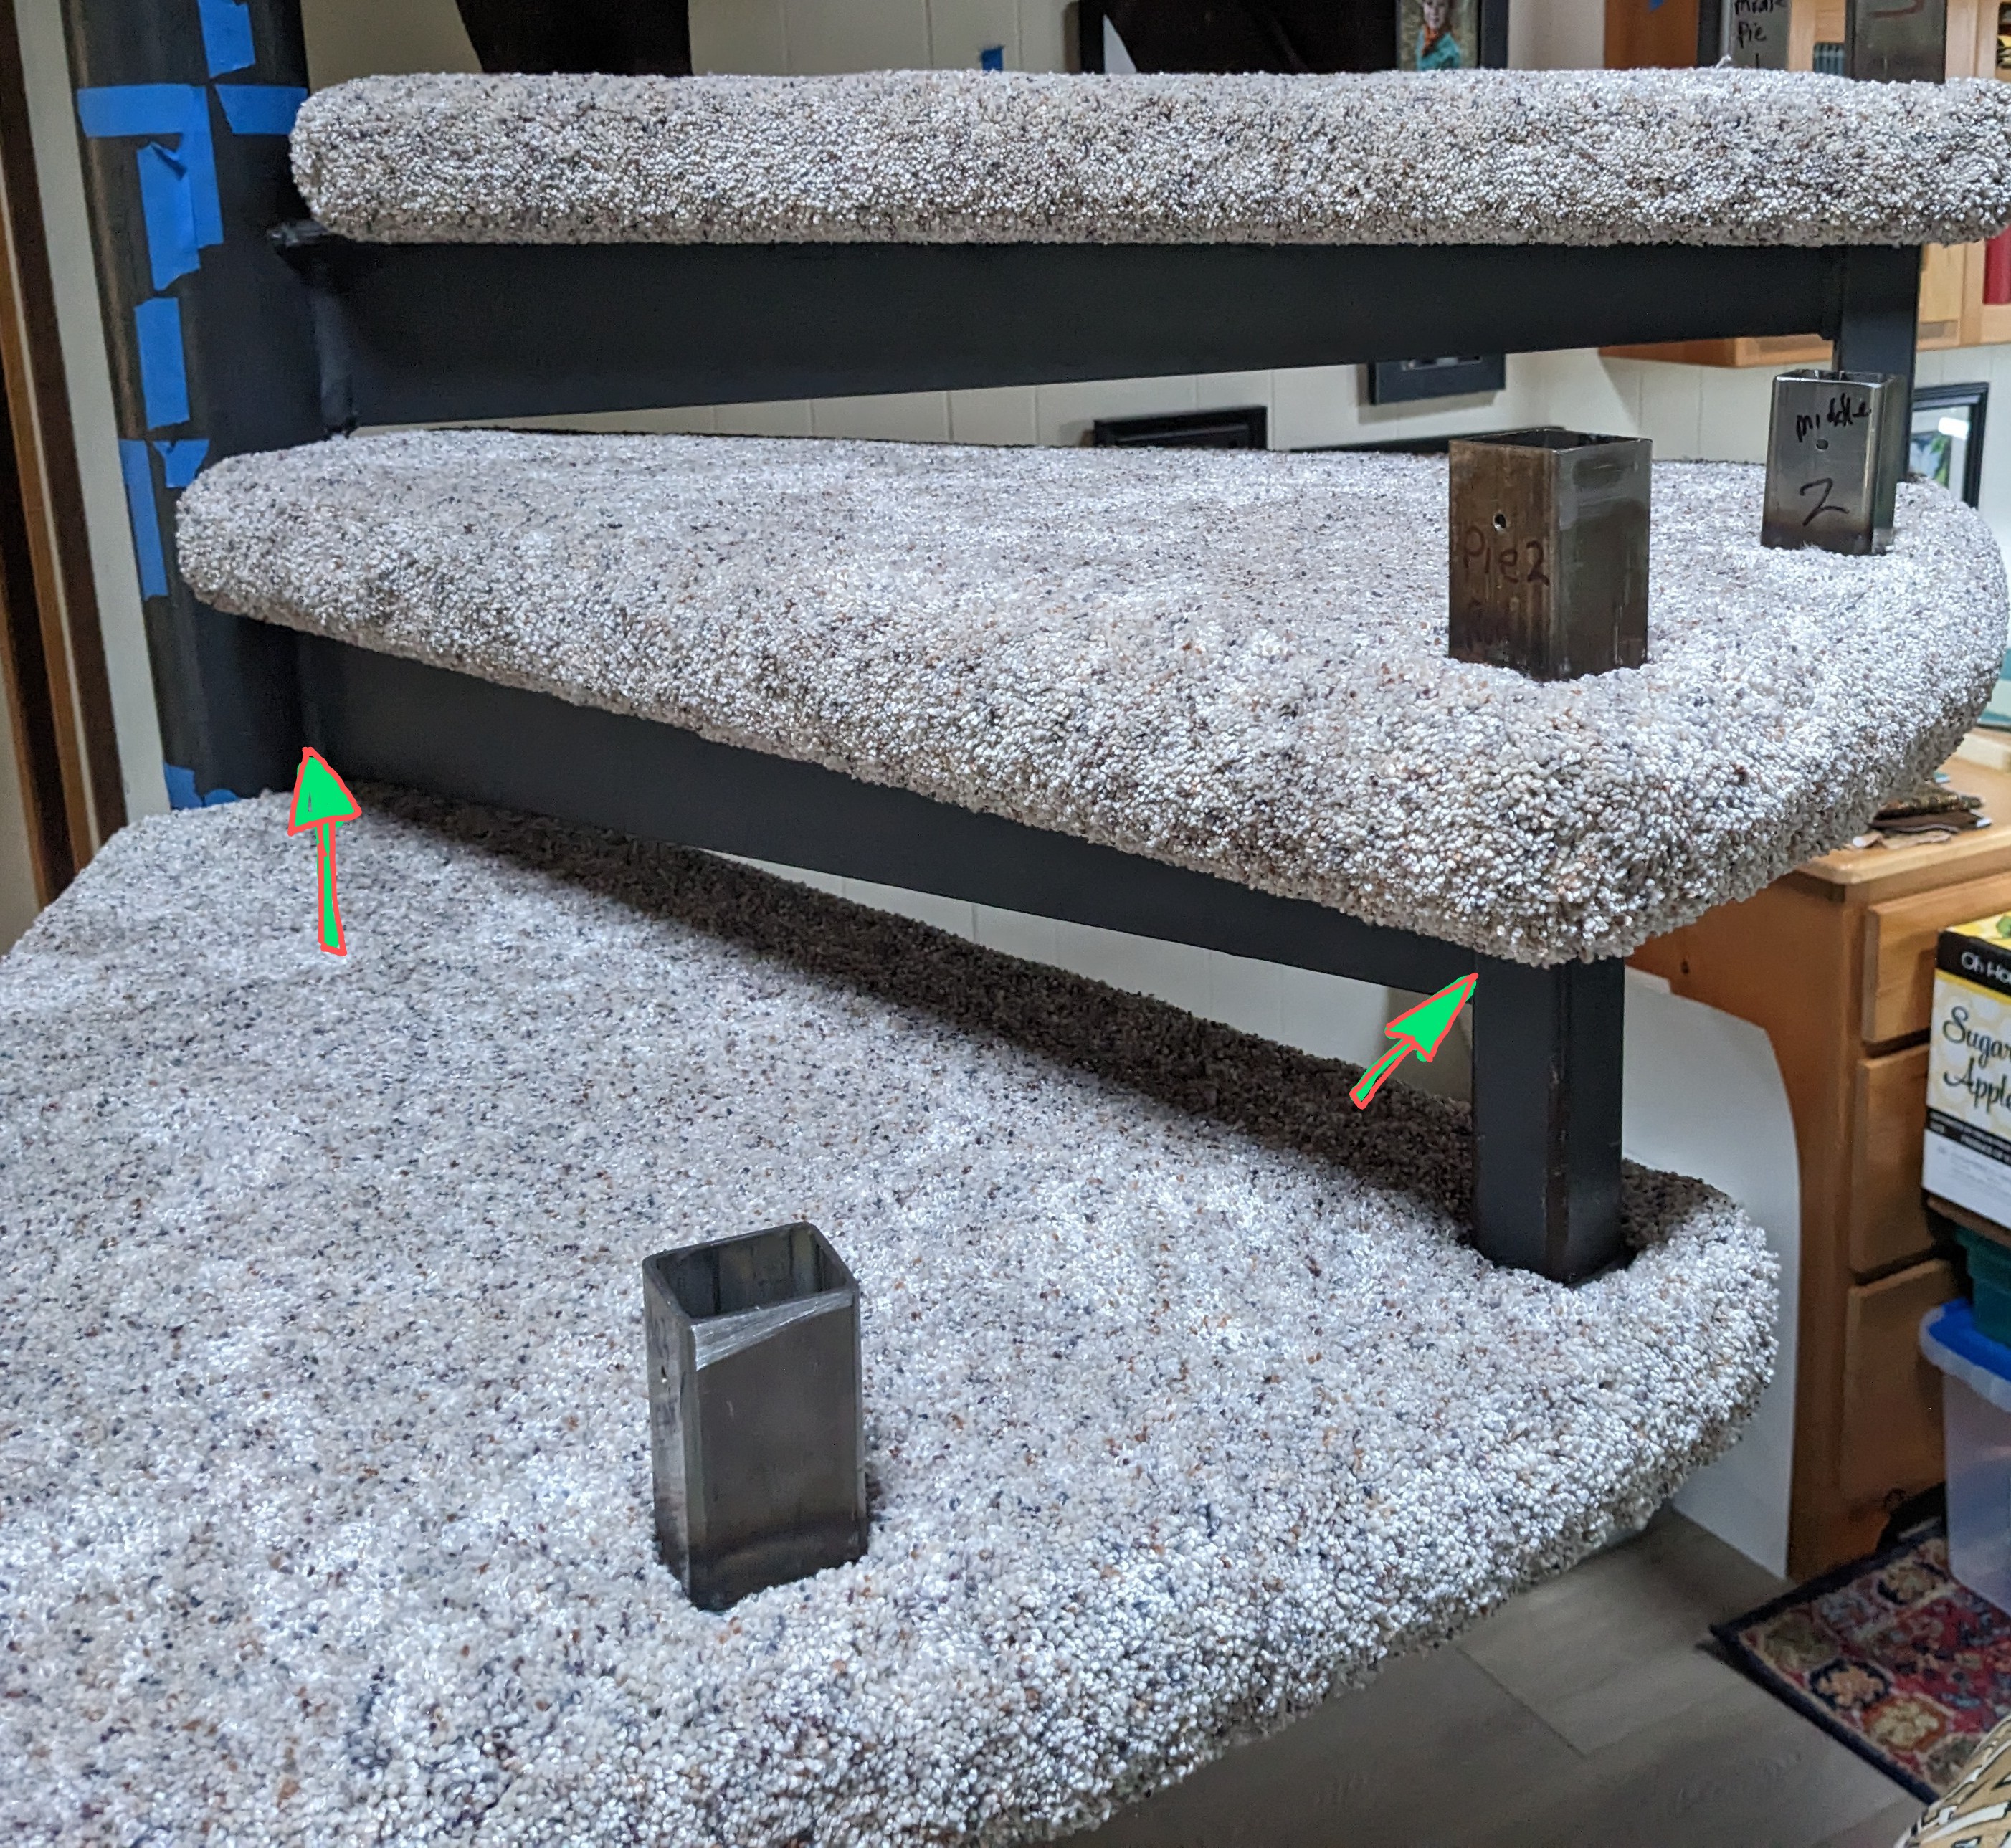
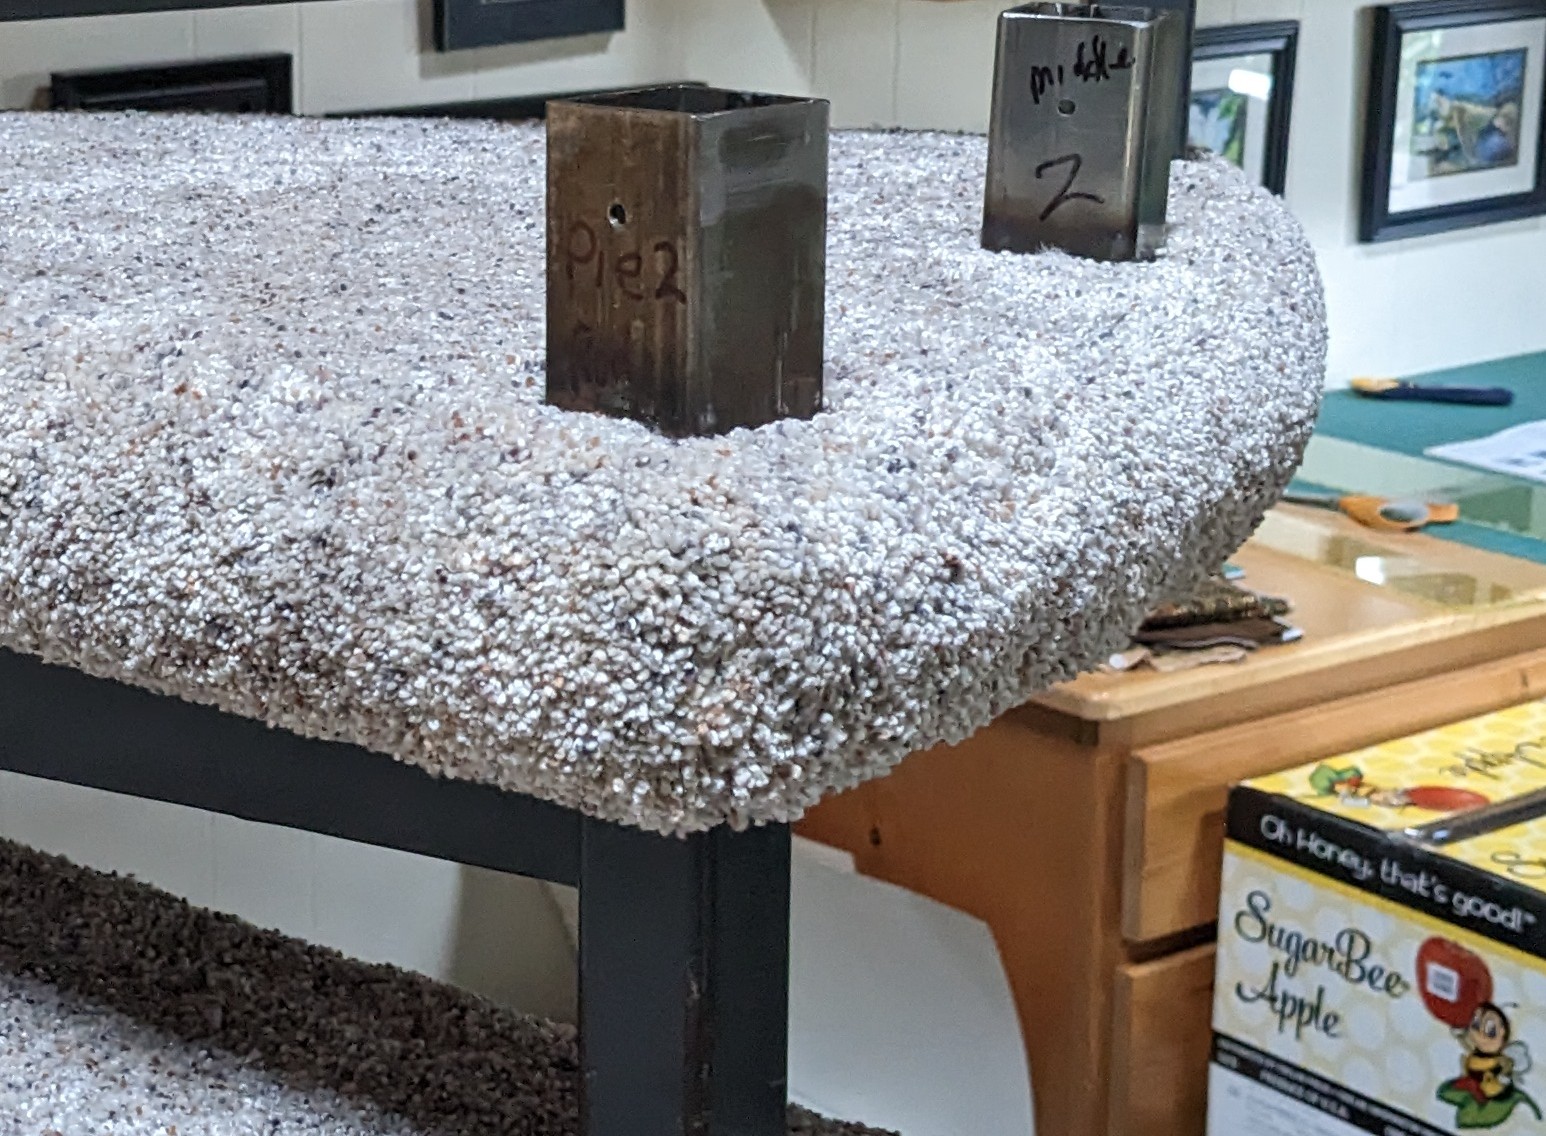
Everything was tight. So tight that one afternoon, I went home to get my large Makita compressor and my CP air chisel to vibrate the sections apart. My #2 dead blow wouldn't budge it. Today we had 10 balusters to drop into those steel buckets on the stairs. When things started going kantywampas even though they were alined properly, we had to put on our Columbo hats.
We will go here and there and everything looks fine but the baulisters wouldn't drop in fully.
Which ones were fighting us, which ones were too tight, which ones were okay?
We had to align this middle curved section of railing with the upper straight section on the first four stairs. The screw holes needed to fit correctly, aligned just like they were when I first took them apart a few weeks ago.
This is why I did the stairs in sections. I did the first four, then put the railing back and made sure it aligned with the curved section which we hadn't removed yet.
Then I removed the curved section and then put it back.
Had I taken all three of the railing sections off in one felled swoop, I'd have had no reference points as to what happened prior. I'd be totally guessing as of what what where and what what wrong.

What have I learned from this?
The bracket that I made for my laser level showed me and told me so much. The three plane laser should be screw locations, angle locations in many of the things.
Looking back, many of those things might not have been necessary.
The question is have they been necessary and I have not done them where would I be now? I have no reference points, the railing wouldn't fit, and I wouldn't have a clue why or how to correct it.
I think I did the correct thing building the bracket for my laser so that I could accurately mark the walls, giving me absolute reference points for if nothing else, to reassure myself.
The largest issue was the wood shrinkage. The stair railing and parts werebobviously made in someone's unheated shop. Once installed, every part of this oak railing shrunk up and tightened either to itself or to the metal parts that fastened the railing to the stairs.
Had he cut all these connection points or dimensions 1/8# shy to make installation easier, it would have went to the together just fine even after shrinking up over the years. I'm convinced that the man who made these stairs was a machinist....

I'm thinking that every piece of wood he machined, was fit to a 0005" tolerance,
and that everything had to be flawlessly exact...... before it shrank. HEY, it's WOOD !!! 😖
 

Attachments

  • PXL_20230314_000125350.jpg
    PXL_20230314_000125350.jpg
    2.8 MB
  • image.jpg
    image.jpg
    2.5 MB
Last edited:

Latest posts

Back
Top