Rotted subfloor, notched joist, & other problems that need repair

Flooring Forum

Help Support Flooring Forum:

This site may earn a commission from merchant affiliate links, including eBay, Amazon, and others.
Like this. ......assuming that joists run left to right.

Shift in second sheet.jpg
 
Last edited:
So I should stagger the subfloor as well? And yes, joists run left to right about 24" apart.
 
Yes , stagger the subfloor as well.. Thomson's is not very good .. Used it before ..

You don't have to flash the Substrate, But you do have to flash the underlayment seems.. The glue will pull the Vinyl down into the gaps ..
 
Yes , stagger the subfloor as well.. Thomson's is not very good .. Used it before ..

You don't have to flash the Substrate, But you do have to flash the underlayment seems.. The glue will pull the Vinyl down into the gaps ..
Hmm.. so some sort of marine sealant would be better?
Speaking of glue, should I use wood glue underneath the subfloor where it lays on joists and maybe between seams? Or would that interfere with expansion/contraction? I don't think I've ever seen wood glue used for that, so I'm curious.

My vinyl sheet would be secured with a double-sided sticky tape like stuff specifically for flooring-- sort of "modified looselay" rather than full adhesive-- bc I know I would screw up full adhesive somehow. I'd end up with a cat stuck to the floor or something out of a Dave Barry article about a woman who glued herself to the floor while installing flooring while wearing just her underwear and had to call EMS to rescue her. LOL.

A marine or spar varnish is for exterior use, most regular varnishes say for interior use. I'd think a marine varnish applied with a roller might be a good idea if you have that much moisture under the house. You might even thin it if the instructions say to do so as a first coat on bare wood. I don't think you'd need more than that single coat for your purposes. I mean, you're not building a boat. You'd want to apply that product in a garage, not in the house as it's oil based and a bit stinky.
I think I'd only apply it to the side that faces down and not on the cut or factory edges if you plan to glue them. I don't think the joists need to be glued if you screw the subfloor down. Screws don't loosen. Coated deck screws have a Torks head (similar to an Allen head) They install a lot easier than a Phillips head screw.
A urethane construction adhesive could be applied to the seam edges if you wanted. That would seal the edges and make the unsupported portion between the joists stronger. After applying a 1/4" or so bead of adhesive to the edge first installed sheet, then dropping the next sheet in place, you'd want to "pry" that sheet against the first one before screwing it down.

Maybe someone can suggest a latex alternative, like house paint, or a sealant. I know there are mold and mildew products that can be added to the paint.
Either way, a high gloss would probably be best. Paint would need an oil based primer, so together, the cost might be as much or more than varnish.......... I haven't checked the differences.

There are double sided acrylic tapes as you mentioned, designed for vinyl flooring and they are not the same as double sided carpet tapes. They are of course, harder to find and more spendy. Do not use the kind made for carpet.
 
Last edited:
A marine or spar varnish is for exterior use, most regular varnishes say for interior use. I'd think a marine varnish applied with a roller might be a good idea if you have that much moisture under the house. You might even thin it if the instructions say to do so as a first coat on bare wood. I don't think you'd need more than that single coat for your purposes. I mean, you're not building a boat. You'd want to apply that product in a garage, not in the house as it's oil based and a bit stinky.
I think I'd only apply it to the side that faces down and not on the cut or factory edges if you plan to glue them. I don't think the joists need to be glued if you screw the subfloor down. Screws don't loosen. Coated deck screws have a Torks head (similar to an Allen head) They install a lot easier than a Phillips head screw.
A urethane construction adhesive could be applied to the seam edges if you wanted. That would seal the edges and make the unsupported portion between the joists stronger. After applying a 1/4" or so bead of adhesive to the edge first installed sheet, then dropping the next sheet in place, you'd want to "pry" that sheet against the first one before screwing it down.

Maybe someone can suggest a latex alternative, like house paint, or a sealant. I know there are mold and mildew products that can be added to the paint.
Either way, a high gloss would probably be best. Paint would need an oil based primer, so together, the cost might be as much or more than varnish.......... I haven't checked the differences.

There are double sided acrylic tapes as you mentioned, designed for vinyl flooring and they are not the same as double sided carpet tapes. They are of course, harder to find and more spendy. Do not use the kind made for carpet.

Thanks. I think I will keep things simple and just use the varnish/sealant of some sort (I'll research to find something good) and use the decking screws.

Good point on using the right tape. I believe they sold the kind for vinyl at home depot somewhere, but I will have to check to confirm that it is not for carpet.

The wording on the rolls can be confusing. They might say vinyl carpet tape........ that doesn't mean vinyl and carpet. ...just means it's vinyl tape but for carpet.
The correct tape will say acrylic tape for vinyl floors/flooring. Something along those lines. Duck brand makes the most well know one.

Thanks. I'll be careful to look for the acrylic tape. And I will practice with small pieces and scrap before I go to actually glue it down permanently.

Question: If I screw up on the adhering and need to move the vinyl, can I loosen the glue with heat (from a hair dryer or something)?

I need to make a note to myself to see if I can figure out where the current joists are so I can figure out the best layout for the subfloor. And I will also have to consider the fact that there is a wall in between where some of the subfloor will go. I'm still debaing whether or not to remove it entirely and put it back up after or to leave it in place.
 
Joists are 16 " on center .. Unless they Baloon framed it ..

Can you post a digram of the area ?
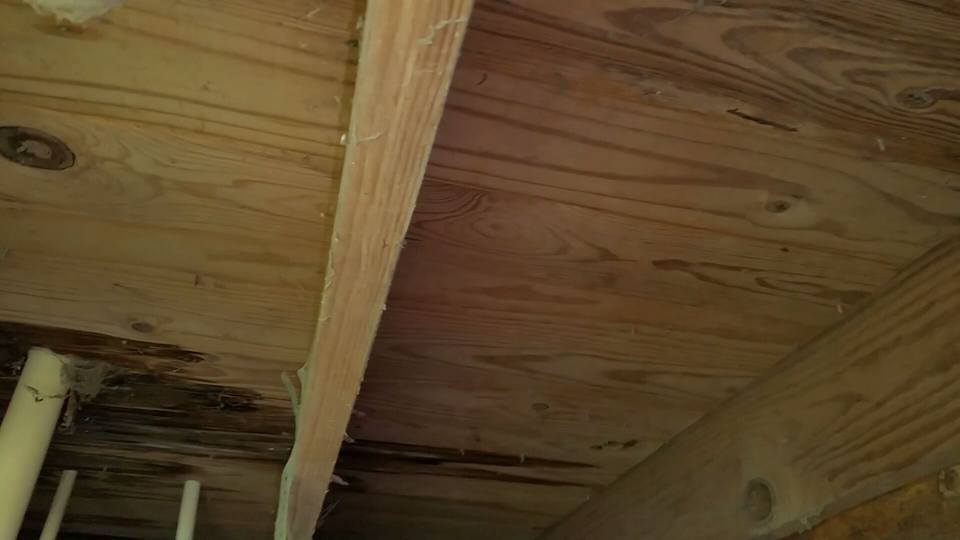
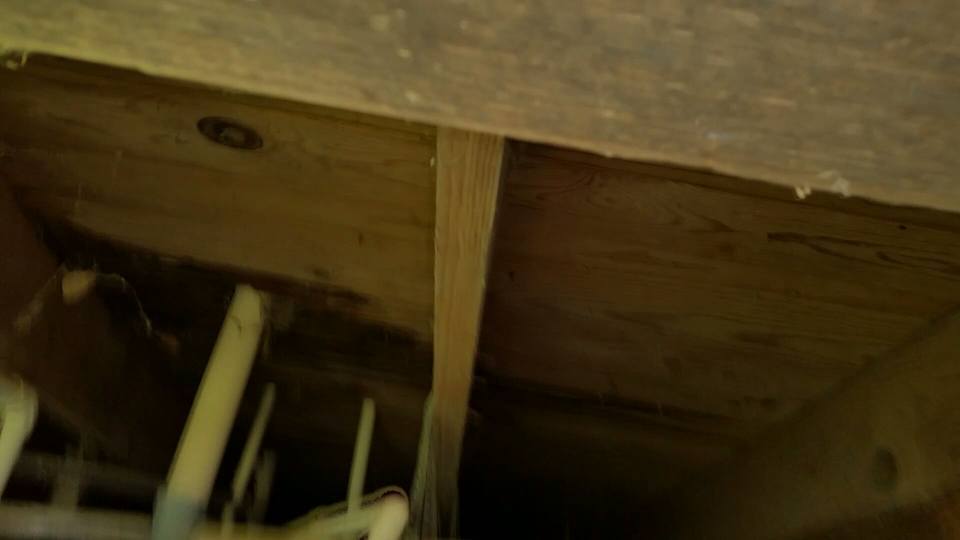
I don't have a diagram of the floor joists because I'm not sure just where they are in relation to the floor above. But to me they don't look like they are 16" apart (but I'm terrible at judging distance and size). I took some video and got screenshots of the underside that I posted upthread.
tumblr_omzq68hmHU1qkwd9ao3_1280.jpg

tumblr_omzq68hmHU1qkwd9ao4_1280.jpg

I believe the larger pipe coming down is 2", but could be mistaken.

It looks to me like they are about 24" apart (again, I suck at eyballing these things). The part I'm going to be working on is the original structure of the house. Additions were made in 1947 (as per the notation on the wood from one of the builders). I don't think they stuck to code on anything when they built the house. No insulation in the exterior walls as far as I can tell.

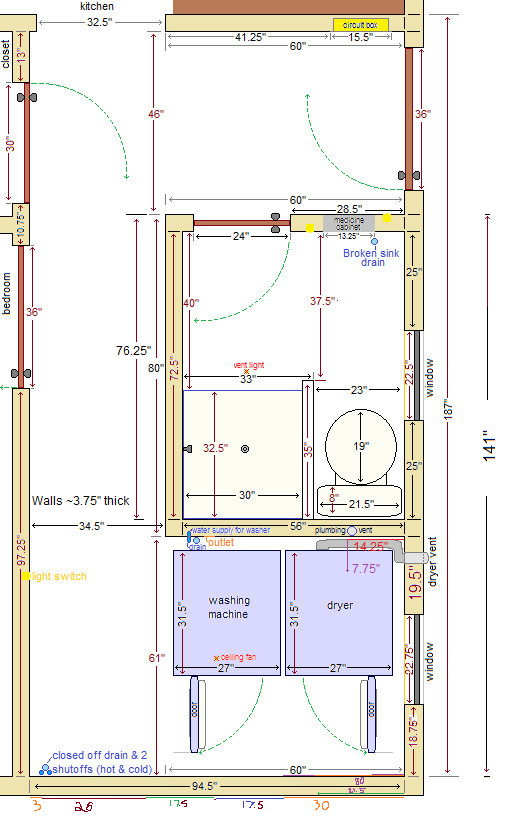
This is an earlier diagram of the existing space (no joists marked), but I did note that the joist does not seem to be directly under the north wall of the current bathroom).
tumblr_ord5q2v6VR1qkwd9ao1_1280.png

The 187" for total length of the area has a marker in the wrong spot, it should end at the north wall, not after it.

tumblr_o1i0bjb1621qkwd9ao5_1280.png


Does any of that help?
 
Last edited:
(but I'm terrible at judging distance and size). That is why they make tape measures .
How you going to cut the plywood without one ? PS: 24" would be considerd Baloon framing ..
 
The lens makes it look 24 on the near side and 16 farther back. If it's too hard to get too with a tape measure, do it the old fashioned way. Hit the floor with a hammer every inch until you hear a 'solid' sound. Mark the spot snd continue hammering until you hear a 'solid' sound again. Ought to be 16 or 24 no matter who did the work. Otherwise, plywood wouldn't end on the joists.
For unsealed plywood it looks good, meaning dry, not pretty. Looks like there's still a leak going on.
 
Nick, what is balloon framing?
I want to measure, but it's hard to get in there and it's going to be raining the next few days. It really poured today.

Highup, the damaged/wet looking floor is under the shower that hasn't been used since 2001. There were no shutoffs for the supply lines in the wall once they entered the house and I don't know if there are shutoffs below. I couldn't really tell from my pictures, but I will have to watch the video again and see if it is evident. The hammer thing sounds like a good idea, once I get the area cleaned up enough that I can see the floor. Laundry (mostly my brother's) and other junk got piled back there and I have to climb over things to get in and out of the laundry room.
 
That is how they built them in the old days .. 24" on center .. I've seen them where they just put a stud where they felt like ..
 
That is how they built them in the old days .. 24" on center .. I've seen them where they just put a stud where they felt like ..
I believe the studs are 16" on center except for in one spot in the current laundry room. I had marked all of the studs at one point but my tape fell off.

Editing to add a question: Could I get away with only staggering the seams side to side on the subfloor layer? The room is only about 2 sheets wide and I'm worried that if I cut wrong I won't get it staggered properly to land on joists. I hope this is making sense.

Also, I saw this in the store https://www.samsclub.com/sams/engin...-iRS58j7T.EMhIsMZBmgwkg&pubNAME=Skimlinks.com with a sample up that I tried to scratch with a key, but it didn't leave a mark. It's actually cheaper in my store even with the 10.5% sales tax. Came out to about $119 for 4 boxes based on the in-store price. 25 year residential warranty. Seems rather smooth. I'll have to show it to my mother and find some slippers in the store to see if they slide too much on it.
 
Last edited:
I posted in another thread about flooring options and realized it was more appropriate for this thread. I ruled out the Samsclub stuff & found something that I think would be better (and looks nicer). It's MSI brand (which I've never heard of before) but says it comes with lifetime warranty residential. It is "waterproof" and has a 20mil wear layer. Planks are about 7"x48". I'd need about 5 boxes (which would get me about 95xsqft) and I need a little over 80.
On the official MSI website it's called Prescott Braly but it's sold on HD as Herritage Mahogany. Samples are a single full board & are free but shipping is $5. Right now it's on sale & I could get free shipping. I do wish it was available from Lowes because I'd get the 10% military discount there.
If I went with this one, I'm trying to decide the right pattern for plank layout. Three of the four corners have doorways. The one corner that doesn't have a doorway will not really be visible once the washer & dryer & lint bin are in place. If my measurements are close enough, the last board on one edge will only be trimmed slightly and I'm debating which edge I want to be the trimmed one (against the exterior door OR along the interior wall).
I came up with 2 layouts (with Fig A being trimmed on the exterior door side and Fig B being trimmed on the interior wall side). What do you guys think?
floorlayoutfigs.png
 
I'm bored again and I noticed that one of the plywood products I linked (the tongue-and-groove subfloor one) purports to be a single layer subfloor application. Now, does that mean it should suffice as the support in a single layer?

If not, do you think it would be ok to paint the underside and edges of it (when used as the bottom layer) with Killz? That way it would seal it up & prevent mold. I was reading that I will need to have a 1/8 gap between the square edges of the plywood sheets so I think the floor patch can be used on those seams.

I know I mentioned before that I want to add a small little landing outside the door. I'm trying to figure out the best/easiest way to build a sturdy one & have a trapdoor or part that can be removed to access the shutoff for the outdoor faucet just outside the door. I'm also planning to see if I can find enough scrap roofing material from when my roof was installed to see if I can use it for an awning. That would add a little extra protection from the rain.
 
I saw Highup's comments about making a "storyboard" and am curious as to how that would work in this room & which edge I should start with. Depending on whether I start with full-length board or half, the upper left plank would touch 3 or 2 doorways. One of the doors already has a threshold, the others would need some sort of transitions added- either T-molding or reducing.
The right edge after the little bump out adjacent to the 36" exterior door, will be under appliances so where it meets the wall will not be as visible.
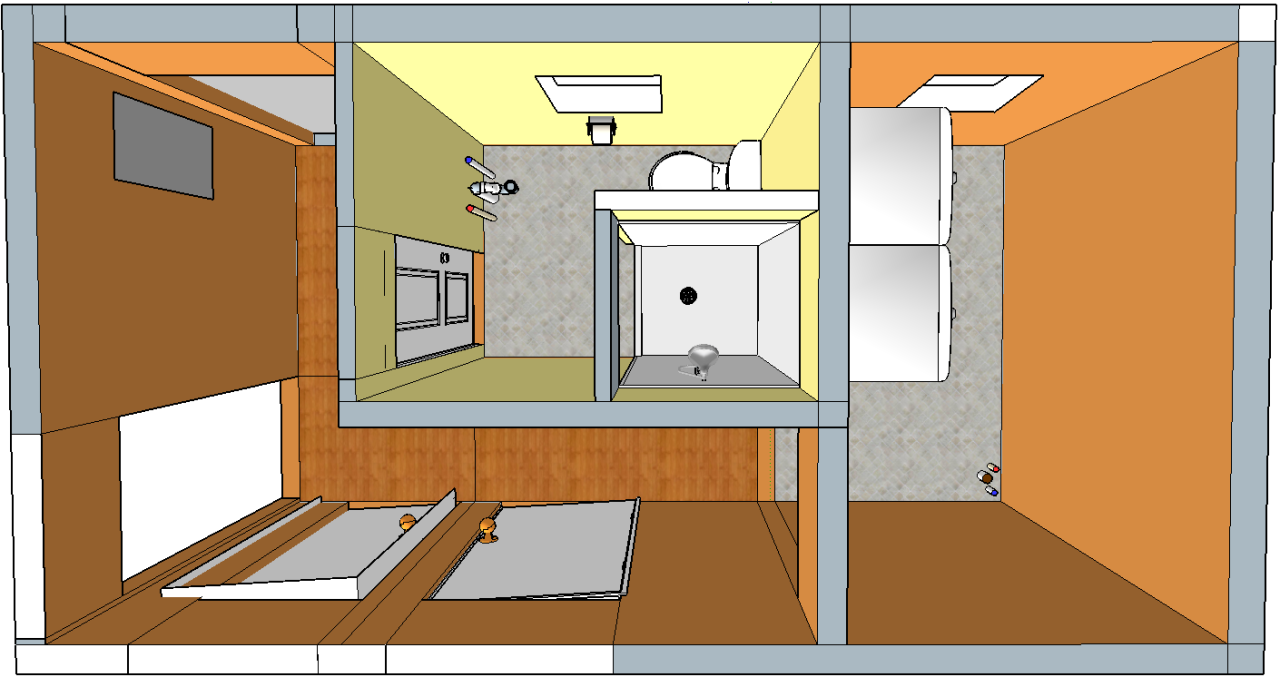
So, here's the layout (with plywood texture over the floor). The boards will be running from left to right.
bathlaundrysketchplywoodfloor1.png
 
Story board would be a bit overkill for that. Just measure the room in inches and divide it by the plank width. If the width of the room ends up 1/4 inch of either making it in full planks or not making it by 1/4 inch, it would be easier to start with 1/2 a plank on the starting wall.
 
Thanks, Highup. I think I'll re-work the space in a new Sketchup file (without all the other stuff that slows the program down) & do the floor layout but leave that 1/8" gap the mfr recommended. I saw a youtube video where a guy figured out how to do his floor layout in sketchup. I just realized that it's ketchup with an S at the front. I wonder if that was deliberate...

Anyway, Something I just thought about: Do the ends in the doorways have to be all even so long as they don't get in the way of the rail for the transition piece & are all covered by the transition piece? I'm guessing it won't matter since that part will be hidden. I mean, I get they should be relatively even, but it doesn't need to be perfect.

As for the board widths, I redid the math subtracting 1/8" along the edges & it looks like it will fit a little less than 13.5 boards across. Would it look terrible if the mostly hidden part was only 1/2 width?
 

Latest posts

Back
Top